Key Terms:
Transducer
- Converts variations in a physical quantity, into an electrical signal
Diaphragm
- A thin sheet of material forming a partition
Electromagnetic Induction
- production of an electromotive force across a conductor
Capacitor plate
- consists of tow conductors separated by a non-conductive region
Pre-amp
- Prepares a small electrical signal for further amplification or processing
Sound pressure levels
- referring to the threshold of hearing or the lowest intensity sound that can be heard by most people measured in decibels (dB)
Definition of microphone Types:
Dynamic
- Thin diaphragm, attached to a coil of thin copper wire. sound vibrates the diaphragm, the coil moves up and down creating an electrical current.
 |
| Image from http://www.mediacollege.com/audio/images/mic-dynamic.gif |
Condenser
-It uses a capacitor to convert the compression and rarefaction of sounds waves into electrical energy.
 |
| Image from http://www.mediacollege.com/audio/images/mic-condenser.gif |
Ribbon
-Uses a thin aluminium of electrically conductive ribbon placed between the poles of a magnet to produce a voltage by electromagnetic induction.
 |
| Image from http://www.vias.org/crowhurstba/img/crowhurst_basic_audio_vol1-58.gif |
Cardioid
- 120 degrees pick up
 |
| Image from http://www.harmonycentral.com/forum/filedata/fetch?id=31129488&d=1398382724 |
-360 degrees pickup
 |
| Image from https://www.tablemike.com/images/flexymike-pics/PolarPattern-Flexymike-Low.jpg |
-front and back pick up
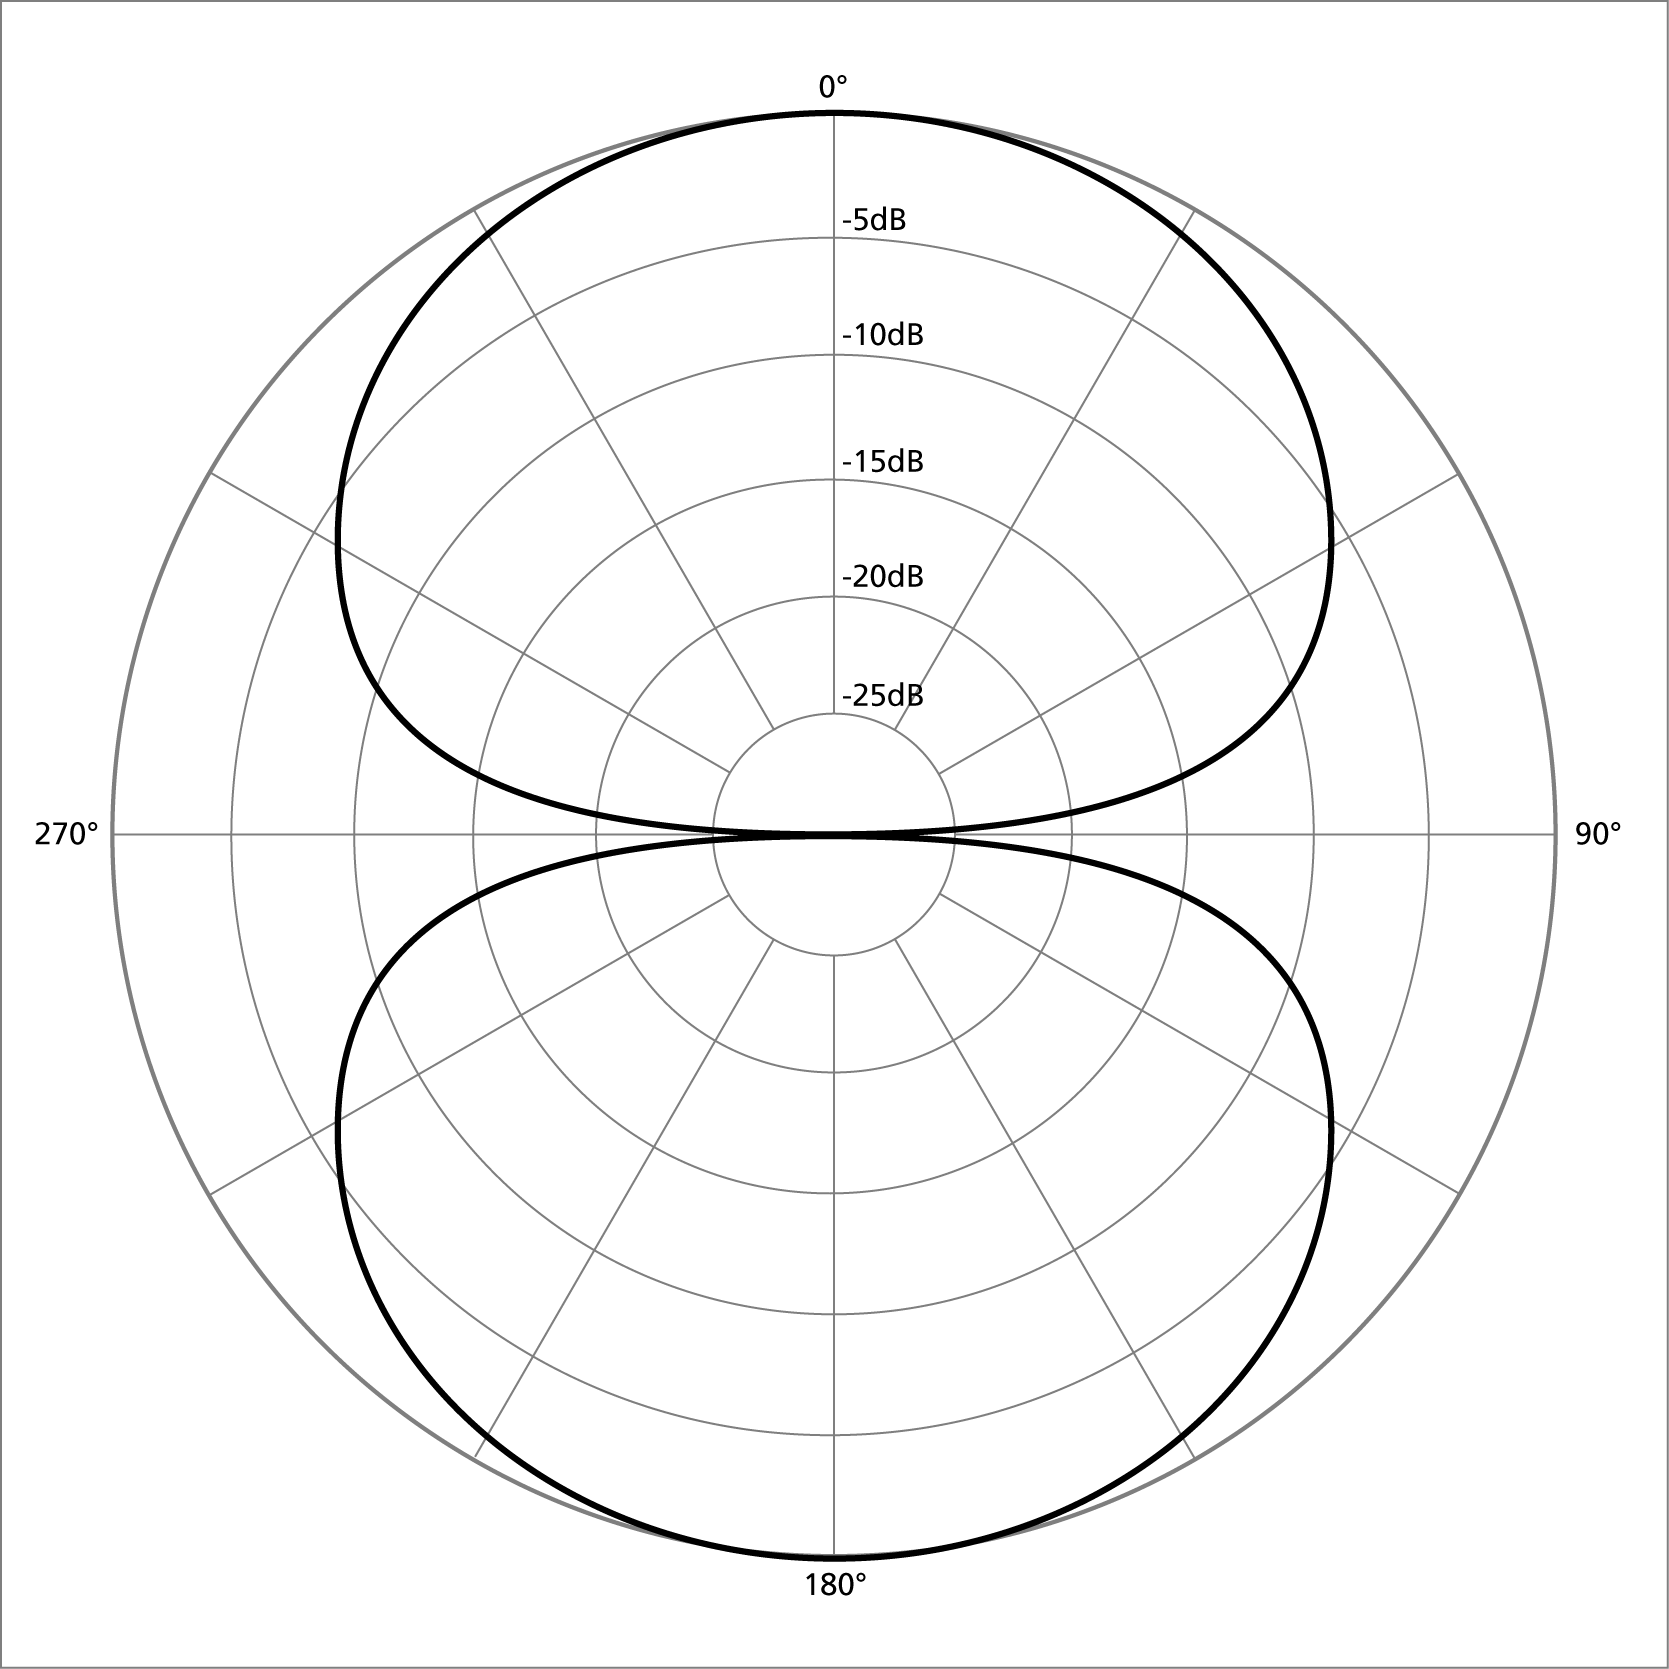 |
| Image from https://upload.wikimedia.org/wikipedia/commons/7/7b/Polar_pattern_figure_eight.png |
Super-cardioid
-100 degrees pick up
 |
| Image from http://jcsites.juniata.edu/faculty/rhodes/dap/images/shotgun.png |
GLOCKENSPIEL
Studio Recordings
Shure
I used a Shure SM58 to record a Glockenspiel in the studio, this is not a typical microphone to use for a percussion instrument, as a Shure microphone is a dynamic. This type of microphone has a frequency response of 50 to 15,000 Hz.
Shure
I used a Shure SM58 to record a Glockenspiel in the studio, this is not a typical microphone to use for a percussion instrument, as a Shure microphone is a dynamic. This type of microphone has a frequency response of 50 to 15,000 Hz.
Position/Distance 10cm away from the instrument, pointing at the keys
Type of microphone Dynamic
Type of microphone Dynamic
 |
| Shure SM58 |
The recording itself is good quality, as there is no background noise or interference with the recording. This shows that the recording was successful and completed to a professional standard. One-way to improve this recording however would be to move the microphone closer to the instrument or adjust the gain. The link to this track is below.
https://soundcloud.com/user-886671367/glock-task-0001-audio-shure
AKG C1001
I also recorded the glockenspiel using an AKG C100, this is a condenser microphone, which is more suited to recording a percussion instrument. The frequency response of this microphone is 50 to 20,000 Hz.
I also recorded the glockenspiel using an AKG C100, this is a condenser microphone, which is more suited to recording a percussion instrument. The frequency response of this microphone is 50 to 20,000 Hz.
Position/Distance 10cm away from the instrument, pointing at the keys
Type of microphone Condenser
Polar Pattern Cardioid/Super cardioid
 |
| AKG C100 |
This recording is clearer and is the best out of all three; this is because I used a condenser microphone. This recording also has no background noise and the quality is very good. An improvement that could be made to this recording is similar to the other recordings, which is to have the microphone closer to the keys. The link to this track is below.
https://soundcloud.com/user-886671367/glock-task-0003-audio-akg-jae
AKG D112
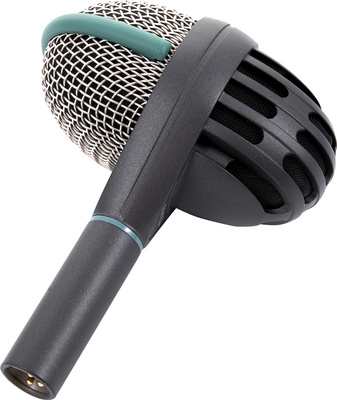 |
| AKG D112 |
Position/Distance 10cm away from the instrument, pointing at the keys
Type of microphone Condenser
Polar Pattern Cardioid
A good point about this recording is that the sound of the instrument is clear, just like the other two recordings. However an overall improvement that can be made to not only this recording but also all the recordings is to have placed the microphone closer to the keys of the glockenspiel. The link to this track is below.
https://soundcloud.com/user-886671367/glock-task-0002-audio-egg-jae
Open-Air Recordings
https://soundcloud.com/user-886671367/glock-task-0002-audio-egg-jae
Open-Air Recordings
Open-air recording 1
I used a special type of microphone called a H2 handy recorder. This type of microphone is useful for all different types of recording including interviews and podcasting. The first time I recorded the glockenspiel I adjusted the microphone so it was Front 90 degrees.
The quality of this recording was okay, however since it was recorded outside you could hear a lot of background noise (e.g. people talking, wind). If I were to do this recording again I would make sure I had a pop shield, which would minimize the amount of background noise that would affect the recording. The link to the track is below.
Open-air recording 2
For the second recording I used the same recorder and remained in the same area for the recording of the glockenspiel. This time around I changed the settings to surround, I also moved the microphone closer to the glockenspiel to see what difference it would make to the overall quality of the recording.
The quality of this recording is slightly better than the first one; this is because I placed the microphone closer to the glockenspiel. However like the first recording I would still use a pop shield as this make the recording more professional. The link to this track is below.
The quality of this recording is slightly better than the first one; this is because I placed the microphone closer to the glockenspiel. However like the first recording I would still use a pop shield as this make the recording more professional. The link to this track is below.
Open-air recording 3
For the last open-air recording I again kept the same surrounding, however I did change the setting on the hand held microphone to 120 degrees (rear). Just to make sure all the recordings were different I adjusted the distance of the microphone. This recording was probably the most successful out of all three of them, however a successful open-air recording is down to controlling the amount of background noise present and making sure the performer is doing the best they can. The link to this track is below.
For the last open-air recording I again kept the same surrounding, however I did change the setting on the hand held microphone to 120 degrees (rear). Just to make sure all the recordings were different I adjusted the distance of the microphone. This recording was probably the most successful out of all three of them, however a successful open-air recording is down to controlling the amount of background noise present and making sure the performer is doing the best they can. The link to this track is below.
https://soundcloud.com/user-886671367/open-air3-jae?in=user-886671367/sets/open-air-recordings-glockenspiel
GUITAR
AKG C1001
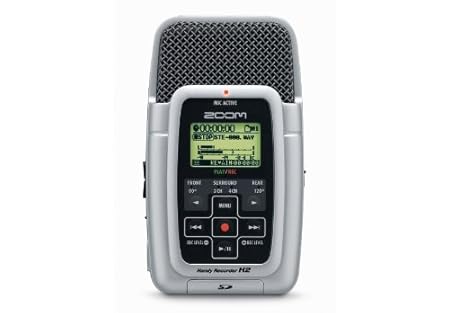 |
| H2 handy recorder |
AKG C1001
I used an AKG C1001 to record a acoustic guitar in the studio, this is a good type of microphone to use for a acoustic instrument. The frequency response of this microphone is 50 to 20,000.
Position/Distance 10cm away facing the performer, above the sound hole
Type of microphone Condenser
Polar Pattern Cardioid
This is a very good recording of the acoustic guitar because not only was the performer on point, but also I believe the microphone placement was correct and that is the main factor that led to this decent recording. The sound was clear and there was no clipping that could be heard. However if were to do this recording again the only factor I would change is possibly using different microphones or using more than one microphone. This way I could test out which positions and which type of microphones work best for recording an acoustic guitar. Alink to the track is below.
Open air recording
After the studio recording I moved on to the open-air recording, I decided to record the acoustic guitar in the presentation suite. I chose to do my open air recording there because there was a lot of extra reverb that filled the room and it created an ambience for the recording. I plugged in the C1001 to the D888 mixing desk, which we used to record the acoustic guitar. I checked the level of the gain to make sure the levels were right.
Position/Distance 10cm away facing the performer, above the sound hole
Type of microphone Condenser
Polar Pattern Cardioid
This recording is again very clear, but you can hear that there is more reverb on this recording and this is due to the location of the recording. Even though a lot of reverb on a recording is not required, I believe for this recording it worked out really well. Also I believe the quality of the performance will automatically be different because for each recording I used a different performer. If I were to do this open-air recording again I would pick a different location to see how the location would affect the overall quality of the recording. A link to the track is below.
https://soundcloud.com/user-886671367/trk01vt1-wav
VOCAL
For the first time recording vocals, I recorded them in the studio. I decided to have a practice recording some vocals with a condenser microphone Rode NT1. Since this was a practice I asked the performer to say whatever they wanted and that they didn't need to produce high quality vocals. Once I set up the microphone with a Jack lead I tested out the levels and I then adjusted the gain, this way the levels would not clip.
Position/Distance 5cm away facing the performer, mic level with the performers mouth
Type of microphone Condenser
Polar Pattern Cardioid
Analysing this recording, it is good for a first attempt recording of vocals. However when I listened back to the recording afterwards I realised that the level of the gain could have been boosted a little higher. Apart from that this practice recording was very successful. The next time I record vocals I will try recording in a different location, to see if this affects the overall quality of the performance. A link to the track is below.
https://soundcloud.com/user-886671367/vocal-practice-1
29/09/15 Recordings
Classroom
Acoustic Guitar
I set up a mic stand and a condenser microphone connected by an XLR lead in a classroom. I chose a classroom because the room provided a lot of extra reverb, this helped the overall quality of the recordings. After setting up the microphone, I plugged in the Kettle lead which provided power to the mixing desk. I then set up a new track on the mixing desk and asked the performer to play the guitar so I could check the levels using the gain.
Position/Distance 10cm away facing the performer, the mic pointing just above the sound hole
Type of microphone Condenser
Polar Pattern Cardioid
With the extra reverb provided by the classroom the recording of the guitar was of a high quality. I believe this is a high quality recording because the gain was set to a suitable level, this can be heard in the recording due to the fact that there is no clipping in the recording. This recording also has no background noise present, which automatically makes the recording more profesional. Furthermore because the performer I chose was highly trained, this also made the overall performance of the recording more professional. A link to the track is below.
https://soundcloud.com/user-886671367/acoustic-guitar-classroomwav
Studio
Vocals
In the studio I plugged an XLR lead into the Rode NT1, which is the best type of microphone for recording vocals. After this I went into the control booth and set up a new track on Cubase 7. I asked the performer to practice singing, while they were doing this I adjusted the level of the gain so it was at a level where the performer could be clearly heard, but not to much that there was clipping. The pop shield attached to the microphone helped prevent any plosives from the performer.
Position/Distance 3 cm away from the performer, mic level with performers mouth
Type of microphone Condenser
Polar Pattern Cardioid
Comparing this vocal recording with the other vocal recording I have, I would argue that this recording is of a higher standard. One reason this recording is of a high standard is because the performer is performing at a high quality and is actually singing. Where as the first vocal recording I was still learning what would work best, also the performer did not sing anything properly. It is important to highlight that a professional recording relies on both the level of the performer and the setting up of the equipment. The pop shield made a huge difference to the performance as well because the first time I recorded vocals, we attempted them without a pop shield. A link to this track is below.
https://soundcloud.com/user-886671367/btec-session-4-0008-audio
Electric Guitar
After recording the vocals I decided to record an electric guitar, so I unplugged the XLR lead from the Rode NT1 and plugged it into a AKG C100s condenser microphone and set the microphone so it was pointing at the strings of the electric guitar. I also plugged the electric guitar into an amp. Same as last time I went back to the control booth and set up a new track on Cubase 7, the same mono as the vocal track. So I could set the gain I asked the performer to play as loud as they were going to for the recording, this helped me set the gain to a suitable level where it would not clip.
Position/Distance 15cm away from the performer, mic pointing at the strings
Type of microphone Condenser
Polar Pattern Cardioid
One of the main successes of this recording is that there was no distortion/clipping on the recording, with all instruments one of the main issues you can come across is distortion/clipping. However one area of the recording that could be improved is the level of the gain, because listening back to the recording it appears that I had the gain to low. However this was only due to the fact that I did not want the recording to clip. However the overall performance of the recording is of a high quality because the performer I chose was at a professional standard. A link to the track is below.
https://soundcloud.com/user-886671367/btec-session-4-0009-audio?in=user-886671367/sets/vocals-electric-guitar-studio
VOCAL
For the first time recording vocals, I recorded them in the studio. I decided to have a practice recording some vocals with a condenser microphone Rode NT1. Since this was a practice I asked the performer to say whatever they wanted and that they didn't need to produce high quality vocals. Once I set up the microphone with a Jack lead I tested out the levels and I then adjusted the gain, this way the levels would not clip.
Position/Distance 5cm away facing the performer, mic level with the performers mouth
Type of microphone Condenser
Polar Pattern Cardioid
Analysing this recording, it is good for a first attempt recording of vocals. However when I listened back to the recording afterwards I realised that the level of the gain could have been boosted a little higher. Apart from that this practice recording was very successful. The next time I record vocals I will try recording in a different location, to see if this affects the overall quality of the performance. A link to the track is below.
https://soundcloud.com/user-886671367/vocal-practice-1
29/09/15 Recordings
Classroom
Acoustic Guitar
I set up a mic stand and a condenser microphone connected by an XLR lead in a classroom. I chose a classroom because the room provided a lot of extra reverb, this helped the overall quality of the recordings. After setting up the microphone, I plugged in the Kettle lead which provided power to the mixing desk. I then set up a new track on the mixing desk and asked the performer to play the guitar so I could check the levels using the gain.
Position/Distance 10cm away facing the performer, the mic pointing just above the sound hole
Type of microphone Condenser
Polar Pattern Cardioid
With the extra reverb provided by the classroom the recording of the guitar was of a high quality. I believe this is a high quality recording because the gain was set to a suitable level, this can be heard in the recording due to the fact that there is no clipping in the recording. This recording also has no background noise present, which automatically makes the recording more profesional. Furthermore because the performer I chose was highly trained, this also made the overall performance of the recording more professional. A link to the track is below.
https://soundcloud.com/user-886671367/acoustic-guitar-classroomwav
Studio
Vocals
In the studio I plugged an XLR lead into the Rode NT1, which is the best type of microphone for recording vocals. After this I went into the control booth and set up a new track on Cubase 7. I asked the performer to practice singing, while they were doing this I adjusted the level of the gain so it was at a level where the performer could be clearly heard, but not to much that there was clipping. The pop shield attached to the microphone helped prevent any plosives from the performer.
Position/Distance 3 cm away from the performer, mic level with performers mouth
Type of microphone Condenser
Polar Pattern Cardioid
Comparing this vocal recording with the other vocal recording I have, I would argue that this recording is of a higher standard. One reason this recording is of a high standard is because the performer is performing at a high quality and is actually singing. Where as the first vocal recording I was still learning what would work best, also the performer did not sing anything properly. It is important to highlight that a professional recording relies on both the level of the performer and the setting up of the equipment. The pop shield made a huge difference to the performance as well because the first time I recorded vocals, we attempted them without a pop shield. A link to this track is below.
https://soundcloud.com/user-886671367/btec-session-4-0008-audio
 |
| Rode NT1 |
Electric Guitar
After recording the vocals I decided to record an electric guitar, so I unplugged the XLR lead from the Rode NT1 and plugged it into a AKG C100s condenser microphone and set the microphone so it was pointing at the strings of the electric guitar. I also plugged the electric guitar into an amp. Same as last time I went back to the control booth and set up a new track on Cubase 7, the same mono as the vocal track. So I could set the gain I asked the performer to play as loud as they were going to for the recording, this helped me set the gain to a suitable level where it would not clip.
Position/Distance 15cm away from the performer, mic pointing at the strings
Type of microphone Condenser
Polar Pattern Cardioid
One of the main successes of this recording is that there was no distortion/clipping on the recording, with all instruments one of the main issues you can come across is distortion/clipping. However one area of the recording that could be improved is the level of the gain, because listening back to the recording it appears that I had the gain to low. However this was only due to the fact that I did not want the recording to clip. However the overall performance of the recording is of a high quality because the performer I chose was at a professional standard. A link to the track is below.
https://soundcloud.com/user-886671367/btec-session-4-0009-audio?in=user-886671367/sets/vocals-electric-guitar-studio
Plans for final recordings and Evaluations
Mixing Desk-Acoustic Guitar
Time of recording: 14:30
Date: 13/10/15
Location: Classroom
List of group: Andrew, Emily, Jamie and Jacob
Roles
Jacob is going to be in charge of setting up the mixing desk and creating a new track on the mixing desk. Emily and Andrew are going to be setting up the microphones for the recordings and making sure that the microphones are at a suitable distance from the instrument, they will also be setting the gain for the recording. Jamie is going to be playing the acoustic guitar for the recording.
Jacob is going to be in charge of setting up the mixing desk and creating a new track on the mixing desk. Emily and Andrew are going to be setting up the microphones for the recordings and making sure that the microphones are at a suitable distance from the instrument, they will also be setting the gain for the recording. Jamie is going to be playing the acoustic guitar for the recording.
Skills
Skills that are going to be required for this recording firstly is teamwork. Teamwork is essential for the recording to work successfully because without teamwork the recording would not work and the recording that is produced would probably be to a low standard. Another skill that is required for this recording to be successful is communication, as a group we will need communication because we will need to ask each other for example if the microphones are working correctly or if the gain has been set to high. All of us will also need to have good listening skills because all of us will need to be able to hear if the guitar is clipping or if there is any background noise on the recording.
Position/Distance 10cm away facing the performer, the mic pointing just above the sound hole
Type of microphone Condenser (AKG C1000s)
Polar Pattern Cardioid
Potential Problems
Problems that we could come across firstly is equipment failure. For example one of the microphones may not work correctly. Ways this can be prevented is by firstly making sure that the microphone is connected to the XLR lead correctly, or replace the XLR lead. If that does not work we will check the levels on the mixing desk because the gain on the mixing desk may be to low and that is why we may not be able to hear anything from the microphone. The last option is to replace the microphone with another one. Another problem we may come across with this recording is that we may not know how one of the controls work on the mixing desk. If this happens we will have to refer back to the mixing desks manual to figure out how the control works. A further issue we could have with the mixing desk is that the desk crashes and we lose the recording. If this problem occurs we will have set the mixing desk back up and if the recording is lost, we will have to make a new recording.
A further issue that could occur with this recording is that the classroom provides to much acoustic reflection and has a negative effect on the quality of the recording. When we listen back to the recording and there is to much acoustic reflection we will either re-record the track or we will move to a different location where there is less acoustic reflection.
Separate problems that could occur when we are recording in the studio are that Cubase does not load or the system completely crashes. If this does occur one way we can prevent this from happening is by either restarting Cubase or if that fails restarting the mac. If the problem keeps on re-occurring we will contact IT support to help us.
Another studio problem we could come across is that all the instruments sound out of tune. If we ever face this problem we will ask the performer to re-tune their instrument, however all these types of checks will occur before recording begins so this issue will be very unlikely.
Techniques used from research
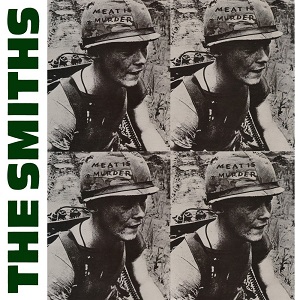
A technique that was used to record guitars was by using two dynamic microphones, a Shure 57 and a Sennheiser 421. This technique was used by Stephen Street in the recording of The Smiths album 'Meat is Murder'. Even though we are using a condenser microphone (AKG C1000s) we may decide to try this technique, if the condenser microphone does not work the way we want it to.
Evaluation
The sound pressure level for this recording is low because we used a condenser microphone and these types of microphones have a low SPL, for an acoustic guitar it was important that the sound pressure was low because this type of instrument produces its own sound. The recording is at a good SPL level. The frequency response for this microphone can be seen below.
The quality of sound of this recording is
good because the timbre is crisp and clear. The strumming of the guitar can be
clearly heard on the recording and there is also no clipping present on the
recording and it is also not a tinny recording. Furthermore this recording has
more acoustic reflection because the area that we recorded the acoustic guitar
in was an empty classroom, which provided natural reverb and made the sound of
the acoustic guitar travel further. The acoustic reflection was useful in this recording
because the extra reverb provided more ambience to the recording.
On the first take of the acoustic guitar
recording we discussed whether the acoustic reflection was needed on the
recording and if we needed to use some absorption, but we decided we didn’t need
any sound proofing on this recording. The resonance of this recording is clear and can be described as a professional. The performer took the time to practice and that clearly shows in this final recording. Another success of this recording is that there is no background noise present, you cannot hear any clipping/distortion or people talking in the background, this automatically brings the recording to a higher standard.
Recording expression and recording emotion are two elements that were down to the performer, even though the performance is not emotional, the expression that is given in this performance again makes the recording very professional. The recording also doesn't involve the listener, like some recordings from The Smiths did, there recordings contain a lot more emotion and expression as well. Furthermore the only problem that we encountered was that the microphone we used did not work. However once we realised it had nothing to do with XLR lead or the mixing desk we replaced the microphone, then the recording did not encounter any more problems. Overall this recording was very successful because I didn't encounter any other problems apart from the microphone not working. A link to the track is below.
https://soundcloud.com/user-886671367/acoustic-guitar-classroomwav
Studio-Vocal
Time of recording: 15:00
Date: 13/10/15
Location: Studio
List of group: Andrew, Emily, Jamie and Jacob
A further issue that could occur with this recording is that the classroom provides to much acoustic reflection and has a negative effect on the quality of the recording. When we listen back to the recording and there is to much acoustic reflection we will either re-record the track or we will move to a different location where there is less acoustic reflection.
Separate problems that could occur when we are recording in the studio are that Cubase does not load or the system completely crashes. If this does occur one way we can prevent this from happening is by either restarting Cubase or if that fails restarting the mac. If the problem keeps on re-occurring we will contact IT support to help us.
Another studio problem we could come across is that all the instruments sound out of tune. If we ever face this problem we will ask the performer to re-tune their instrument, however all these types of checks will occur before recording begins so this issue will be very unlikely.
Techniques used from research
A technique that was used to record guitars was by using two dynamic microphones, a Shure 57 and a Sennheiser 421. This technique was used by Stephen Street in the recording of The Smiths album 'Meat is Murder'. Even though we are using a condenser microphone (AKG C1000s) we may decide to try this technique, if the condenser microphone does not work the way we want it to.
Evaluation
The sound pressure level for this recording is low because we used a condenser microphone and these types of microphones have a low SPL, for an acoustic guitar it was important that the sound pressure was low because this type of instrument produces its own sound. The recording is at a good SPL level. The frequency response for this microphone can be seen below.
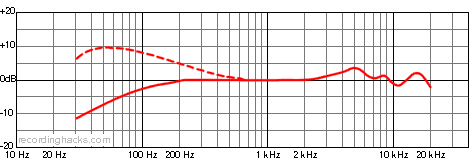 |
| Frequency response of a AKG C100s condenser microphone |
 |
| Picture of microphone set up |
 |
| Mixing desk, attached with XLR lead |
Recording expression and recording emotion are two elements that were down to the performer, even though the performance is not emotional, the expression that is given in this performance again makes the recording very professional. The recording also doesn't involve the listener, like some recordings from The Smiths did, there recordings contain a lot more emotion and expression as well. Furthermore the only problem that we encountered was that the microphone we used did not work. However once we realised it had nothing to do with XLR lead or the mixing desk we replaced the microphone, then the recording did not encounter any more problems. Overall this recording was very successful because I didn't encounter any other problems apart from the microphone not working. A link to the track is below.
https://soundcloud.com/user-886671367/acoustic-guitar-classroomwav
Studio-Vocal
Time of recording: 15:00
Date: 13/10/15
Location: Studio
List of group: Andrew, Emily, Jamie and Jacob
Roles
Emily is going to be in charge of setting up the mixing desk and creating a new track on Cubase. Jacob and Andrew are going to be setting up the microphones for the recordings and making sure that the microphones are at a suitable distance from the instrument, they will also be setting the gain for the recording. Jamie is going to be singing.
Potential Problems
Emily is going to be in charge of setting up the mixing desk and creating a new track on Cubase. Jacob and Andrew are going to be setting up the microphones for the recordings and making sure that the microphones are at a suitable distance from the instrument, they will also be setting the gain for the recording. Jamie is going to be singing.
Skills
Skills that are going to be required for this recording firstly is teamwork. Teamwork is essential for the recording to work successfully because without teamwork the recording would not work and the recording that is produced would probably be to a low standard. Another skill that is required for this recording to be successful is communication, as a group we will need communication because we will need to ask each other for example if the microphones are working correctly or if the gain has been set to high. All of us will also need to have good listening skills because all of us will need to be able to hear if the guitar is clipping or if there is any background noise on the recording.
Position/Distance 3cm away facing the performer, the mic pointing at performers mouth
Type of microphone Condenser (Rode NT1)
Polar Pattern Cardioid
Potential Problems
Problems that we could come across firstly is equipment failure. For example one of the microphones may not work correctly. Ways this can be prevented is by firstly making sure that the microphone is connected to the XLR lead correctly, or replace the XLR lead. If that does not work we will check the levels on the mixing desk because the gain on the mixing desk may be to low and that is why we may not be able to hear anything from the microphone. The last option is to replace the microphone with another one. Another problem we may come across with this recording is that we may not know how one of the controls work on the mixing desk. A further issue we could have with the mixing desk is that the desk crashes and we lose the recording. If this problem occurs we will have set the mixing desk back up and if the recording is lost, we will have to make a new recording. A further issue that could occur with this recording is that the classroom provides to much acoustic reflection and has a negative effect on the quality of the recording. When we listen back to the recording and there is to much acoustic reflection we will either re-record the track or we will move to a different location where there is less acoustic reflection.
Separate problems that could occur when we are recording in the studio are that Cubase does not load or the system completely crashes. If this does occur one way we can prevent this from happening is by either restarting Cubase or if that fails restarting the mac. If the problem keeps on re-occurring we will contact IT support to help us. Another studio problem we could come across is that all the instruments sound out of tune. If we ever face this problem we will ask the performer to re-tune their instrument, however all these types of checks will occur before recording begins so this issue will be very unlikely.
Techniques used from research
From my research I have learned that Street recorded all of his performers vocals by using an Neumann 87 or 47 condenser microphone. Sometimes street also used hand held dynamic microphones like a Shure 58, which would be a good type of microphone to use for an open-air recording. The type of microphone we are using is also a condenser microphone, a Rode NT1.
Evaluation
The sound pressure level for this recording is low, because the vocalist did not have a very high range and was not used to performing. Furthermore the type of microphone that I used was another condenser microphone which has a low SPL, vocals are also an instrument that produces its own sound. The frequency response of the Rode NT1 can be see below.
The quality of sound for this recording has a thin timbre, as the vocals are clear and are expressive. The vocals have not been altered in any way, for instance there has been no EQ or reverb added to the vocal. Another reason this is a high quality recording is because the words of the song are clearly pronounced. The acoustic reflection in this recording is hardly present, that is because we recorded the vocals in the studio and we also used a pop shield to help prevent plosives. The absorption in the studio also helped prevent reflections of extra natural reverb.
The resonance of this recording is rich with emotion and expression because the performer picked a song that they wanted to perform. The performer also did a few practice run throughs just to make sure they were ready, at one point we did have to tell the performer to sing louder so we could gain more emotion out of the performance, once we did this the vocal was fine. To make sure that there was no background noise on the recording, we covered up the drums so the cymbals would not vibrate when the performer was performing. This was beneficial to do because there is no background noise present on the recording. To make sure that the recording contained expression and emotion we did a few takes of the vocals and then picked the best one. This was a wise action to take because the vocals contain emotion and are clearly expressed by the performer. Similar to The Smiths the vocalist is not professionally trained, but like The Smith still delivers an expressive performance. A link to the track is below.
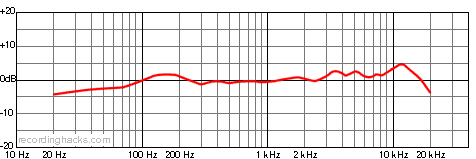 |
| Frequency response of a Rode NT1 condenser microphone |
 |
| XLR lead is connected to Mono 2, providing power to the microphone |
 |
| Picture of performer facing the microphone |
Mixing Desk- Piano
Time of recording: 15:30
Date: 13/10/15
Location: Theatre
List of group: Andrew, Emily, Jamie and Jacob
Roles
Andrew is going to be in charge of setting up the mixing desk and creating a new track on the mixing desk. Jamie and Emily are going to be setting up the microphones for the recordings and making sure that the microphones are at a suitable distance from the instrument, they will also be setting the gain for the recording. Jacob is going to be playing the piano.
Skills
Skills that are going to be required for this recording firstly is teamwork. Teamwork is essential for the recording to work successfully because without teamwork the recording would not work and the recording that is produced would probably be to a low standard. Another skill that is required for this recording to be successful is communication, as a group we will need communication because we will need to ask each other for example if the microphones are working correctly or if the gain has been set to high. All of us will also need to have good listening skills because all of us will need to be able to hear if the guitar is clipping or if there is any background noise on the recording.
Position/Distance 15cm away, one mic under the left side of the piano, and one mic under the
right side of the piano, both pointing up towards the keys
right side of the piano, both pointing up towards the keys
Type of microphone Condenser (AKG C1000s x2)
Polar Pattern Cardioid
Problems that we could come across firstly is equipment failure. For example one of the microphones may not work correctly. Ways this can be prevented is by firstly making sure that the microphone is connected to the XLR lead correctly, or replace the XLR lead. If that does not work we will check the levels on the mixing desk because the gain on the mixing desk may be to low and that is why we may not be able to hear anything from the microphone. The last option is to replace the microphone with another one. Another problem we may come across with this recording is that we may not know how one of the controls work on the mixing desk. A further issue we could have with the mixing desk is that the desk crashes and we lose the recording. If this problem occurs we will have set the mixing desk back up and if the recording is lost, we will have to make a new recording. A further issue that could occur with this recording is that the classroom provides to much acoustic reflection and has a negative effect on the quality of the recording.When we listen back to the recording and there is to much acoustic reflection we will either re-record the track or we will move to a different location where there is less acoustic reflection. Separate problems that could occur when we are recording in the studio are that Cubase does not load or the system completely crashes. If this does occur one way we can prevent this from happening is by either restarting Cubase or if that fails restarting the mac. If the problem keeps on re-occurring we will contact IT support to help us. Another studio problem we could come across is that all the instruments sound out of tune. If we ever face this problem we will ask the performer to re-tune their instrument, however all these types of checks will occur before recording begins so this issue will be very unlikely.
Techniques used from research
For recording piano I could not find any techniques that Street used to record for The Smiths album. However the way we are going to record piano is by having two AKG C1000s microphones, both pointing up towards of the keys of the piano, one on the left side of the piano and one on the right side of the piano.
Evaluation
The sound pressure level for this recording is higher than the other two recordings because the volume on the piano was turned up. However similar to the other two recordings I used a condenser microphone, and they have a low SPL, except one difference is that I used two AKG C1000s to record the piano. The quality of sound of this recording has a thick timbre and is also sharp. Since we recorded the piano in the theatre there was going to be a lot of acoustic reflection, so we decided to put some sheets around the piano. So when we listened to the recording on the desk there was hardly any acoustic reflection, we felt that a lot of acoustic reflection would have had a negative effect on this recording. The sheets propped up round the piano provided absorption for the recording.
The resonance of this recording is deep and clear, the notes that are played can be clearly heard on the recording. The performer was not completely trained, which can be heard on the recording. But I believe the recording is at a high enough level because there is no background noise present on the recording. There is no rustling or clipping, this shows that the microphones were in a good position. This links to the recording expression and emotion because as I previously mentioned the performer was not the most experienced piano player, however the performer still managed to put across emotion and expression in the performance. This may be due to the fact that like the other recordings, the performers were allowed to pick what songs they covered. I believe this is one of the reasons as to why all of the recordings are a high quality. A link to the track is below.
https://soundcloud.com/user-886671367/final-recording-piano?in=user-886671367/sets/final-recordings
The sound pressure level for this recording is higher than the other two recordings because the volume on the piano was turned up. However similar to the other two recordings I used a condenser microphone, and they have a low SPL, except one difference is that I used two AKG C1000s to record the piano. The quality of sound of this recording has a thick timbre and is also sharp. Since we recorded the piano in the theatre there was going to be a lot of acoustic reflection, so we decided to put some sheets around the piano. So when we listened to the recording on the desk there was hardly any acoustic reflection, we felt that a lot of acoustic reflection would have had a negative effect on this recording. The sheets propped up round the piano provided absorption for the recording.
 |
| AKG C1000s connected with XLR lead, pointing at the right side of the piano |
 |
| AKG C1000s connected with XLR lead, pointing at the left side of the piano |
https://soundcloud.com/user-886671367/final-recording-piano?in=user-886671367/sets/final-recordings